A lot of this guide came from the native Instructions provided at https://docs.microsoft.com/en-us/intune/apps-win32-app-management
The first step of the process is to install the Microsoft-Win32-Content-Prep-Tool, I’m using Version 1.5 (See release notes for more information)
Before you install and the use Microsoft Win32 Content Prep Tool you must:
- Review the Microsoft License Terms for Microsoft Win32 Content Prep Tool. Print and retain a copy of the license terms for your records. By downloading and using Microsoft Win32 Content Prep Tool, you agree to such license terms. If you do not accept them, do not use the software.
- Review the Microsoft Intune Privacy Statement for information on the privacy policy of the Microsoft Win32 Cotnent Prep Tool.
Sample commands to use for the Microsoft Win32 Content Prep Tool:
- IntuneWinAppUtil -h
- This will show usage information for the tool.
- IntuneWinAppUtil -c <setup_folder> -s <source_setup_file> -o <output_folder> <-q>
- This will generate the .intunewin file from the specified source folder and setup file.
- For MSI setup file, this tool will retrieve required information for Intune.
- If -q is specified, it will be in quiet mode. If the output file already exists, it will be overwritten.
- Also if the output folder does not exist, it will be created automatically.
- IntuneWinAppUtil
- If no parameter is specified, this tool will guide you to input the required parameters step by step.
Command-line parameters available
- -h Help
- -c <setup_folder> Setup folder for all setup files. All files in this folder will be compressed into .intunewin file.
- Only the setup files for this app should be in this folder.
- -s <setup_file> Setup file (e.g. setup.exe or setup.msi).
- -o <output_file> Output folder for the generated .intunewin file.
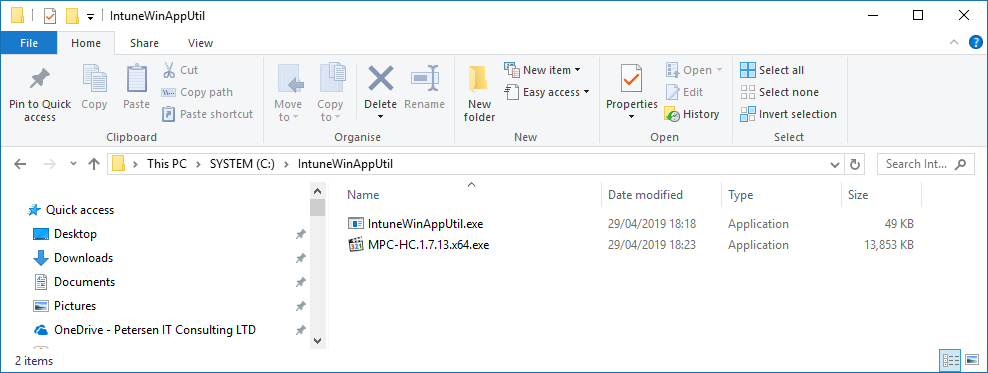
Let’s get started. I’ve downloaded the tool to C:\IntuneWinAppUtil\IntuneWinAppUtil.exe and we are going to package a free, open source media player for Windows ‘Media Player Classic’ so I’ve also downloaded the source files in preparation for the deployment.
For of all I’m going to run C:\IntuneWinAppUtil\Source\MPC-HC.1.7.13.x64.exe /? To get the installation switches required:
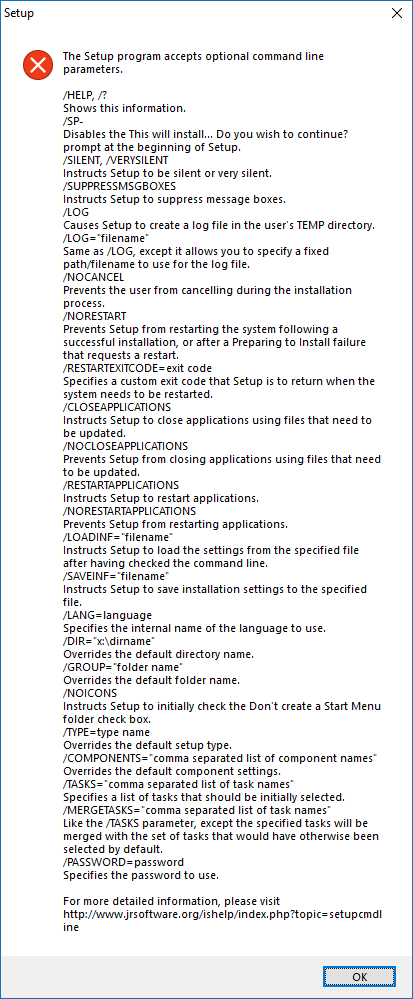
I see the installation switch we require here is C:\IntuneWinAppUtil\Source\MPC-HC.1.7.13.x64.exe /VERYSILENT /NORESTART
So we take these switches and add them into the commandline to generate the .intunewin file, in this example that is:
C:\IntuneWinAppUtil\IntuneWinAppUtil -c C:\IntuneWinAppUtil\Source -s C:\IntuneWinAppUtil\Source\MPC-HC.1.7.13.x64.exe /VERYSILENT /NORESTART -o C:\IntuneWinAppUtil\Output -q
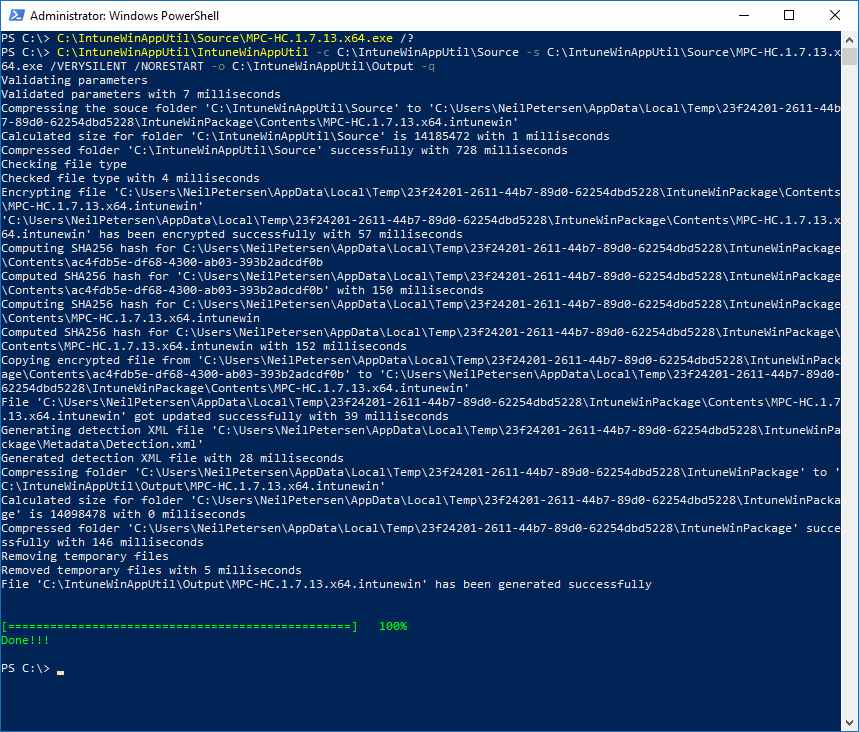
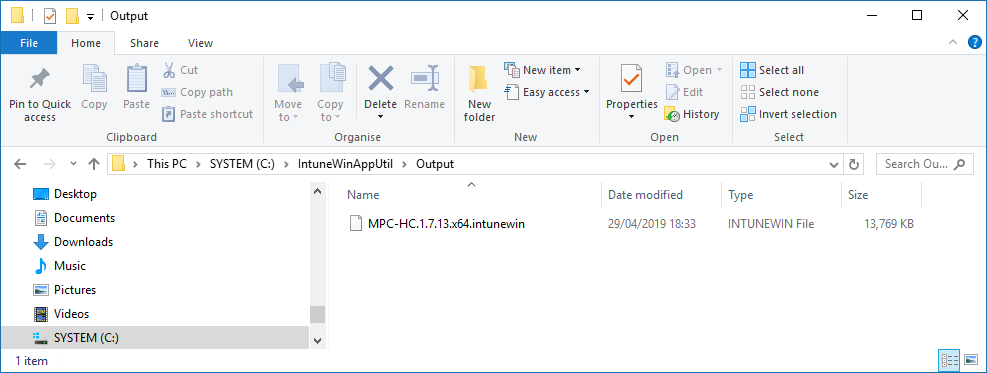
We can see the last line reads ‘File 'C:\IntuneWinAppUtil\Output\MPC-HC.1.7.13.x64.intunewin' has been generated successfully’ and we can see in Windows Explorer it wasn’t lying, we now have out Media Player Classic .intunewin file.
Now let’s get this into Intune for deployment.
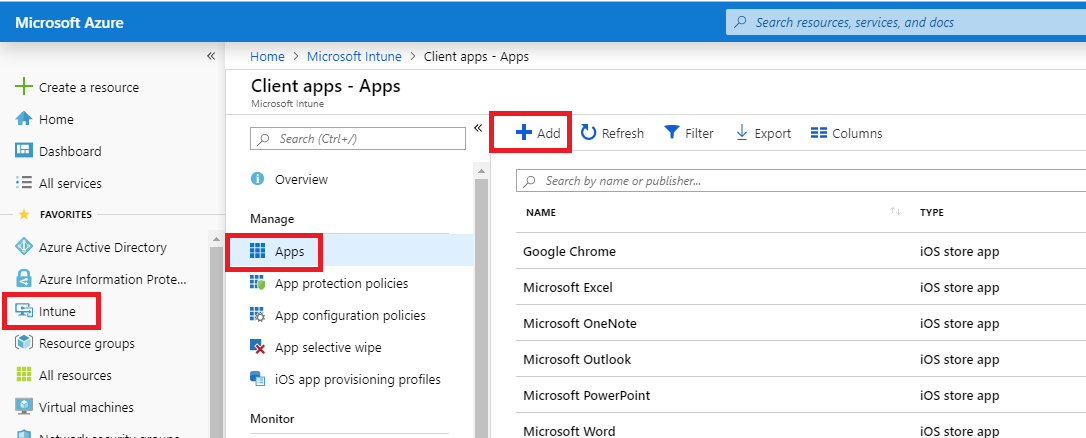
Logon to the Azure portal and open the Intune blade, Select Apps (https://portal.azure.com/#blade/Microsoft_Intune_Apps/MainMenu/1/selectedMenuItem/Overview) and then Add
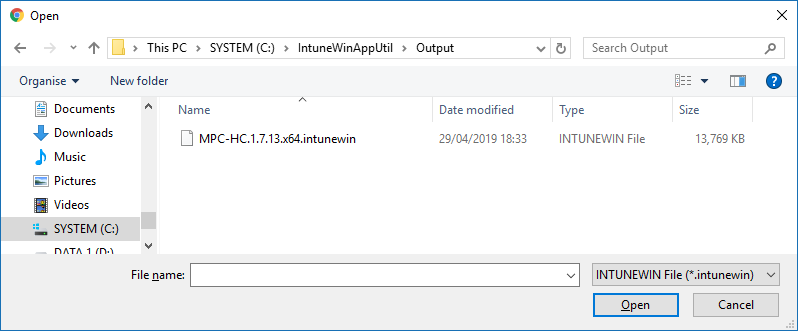
You will now be prompted to select the App type, choose Windows app (Win32) from the drop down list. Browse to your package file (this is the .intunewin file we just created) and then select Open
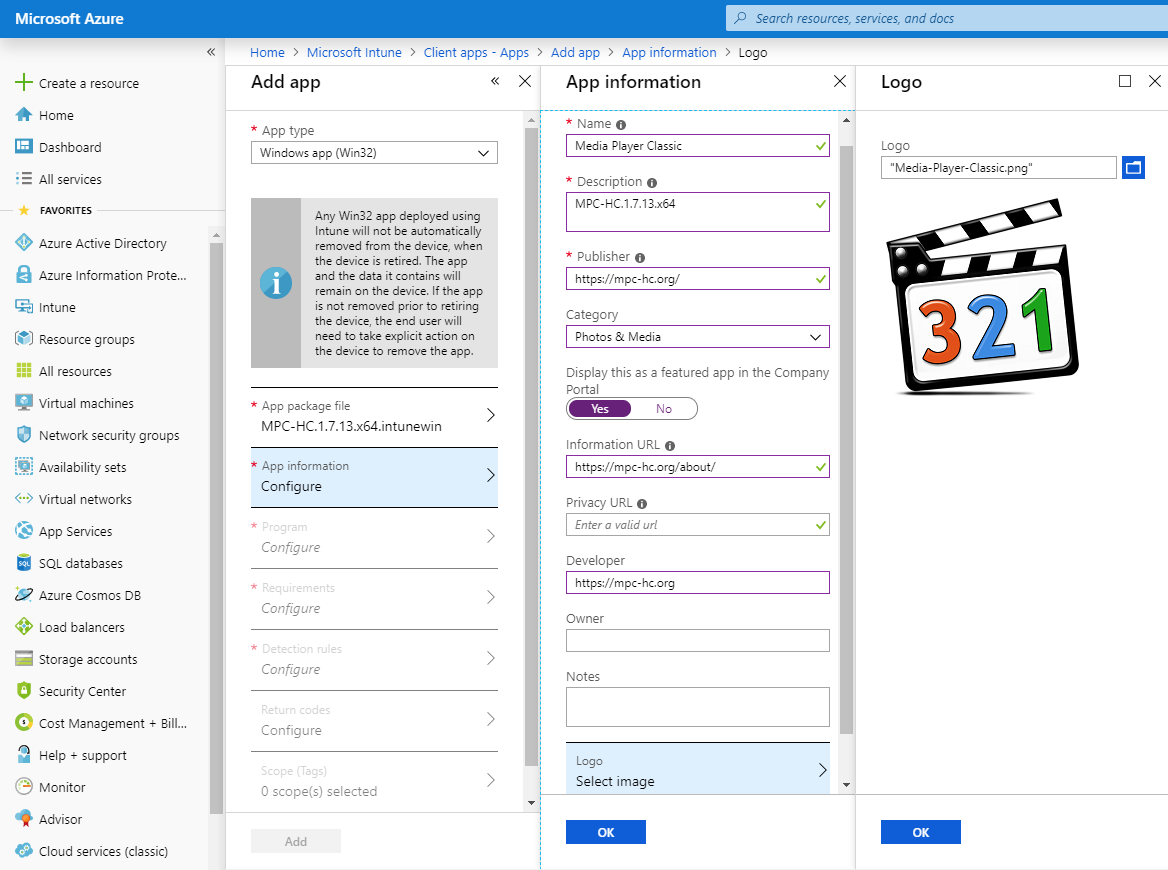
Configure the required App information and add a Logo for your users, select OK
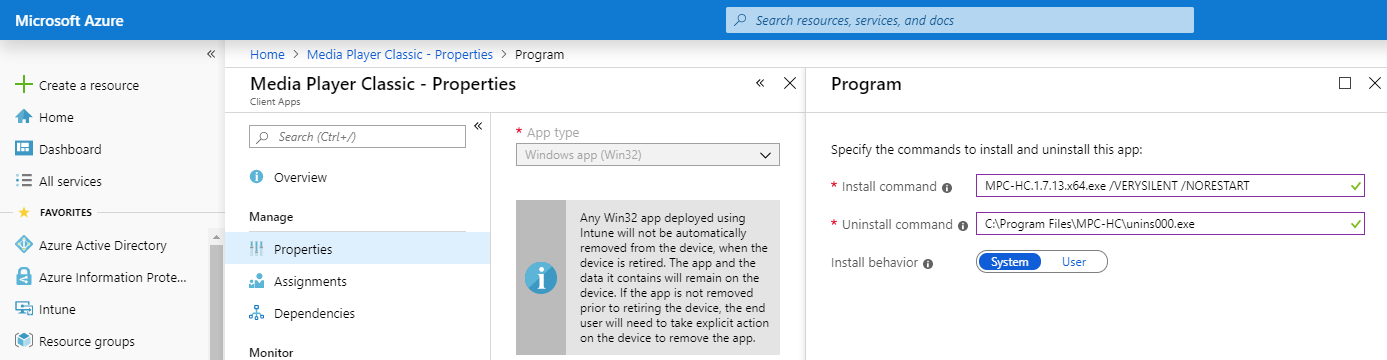
Now enter the details within the Program blade. This is the install and uninstall commands and he install behaviour for example
Install Command = MPC-HC.1.7.13.x64.exe /VERYSILENT /NORESTART
Uninstall Command = C:\Program Files\MPC-HC\unins000.exe
(you can find the uninstall string from the relevant registry key within the HKEY_LOCAL_MACHINE\SOFTWARE\Microsoft\Windows\CurrentVersion\Uninstall\)
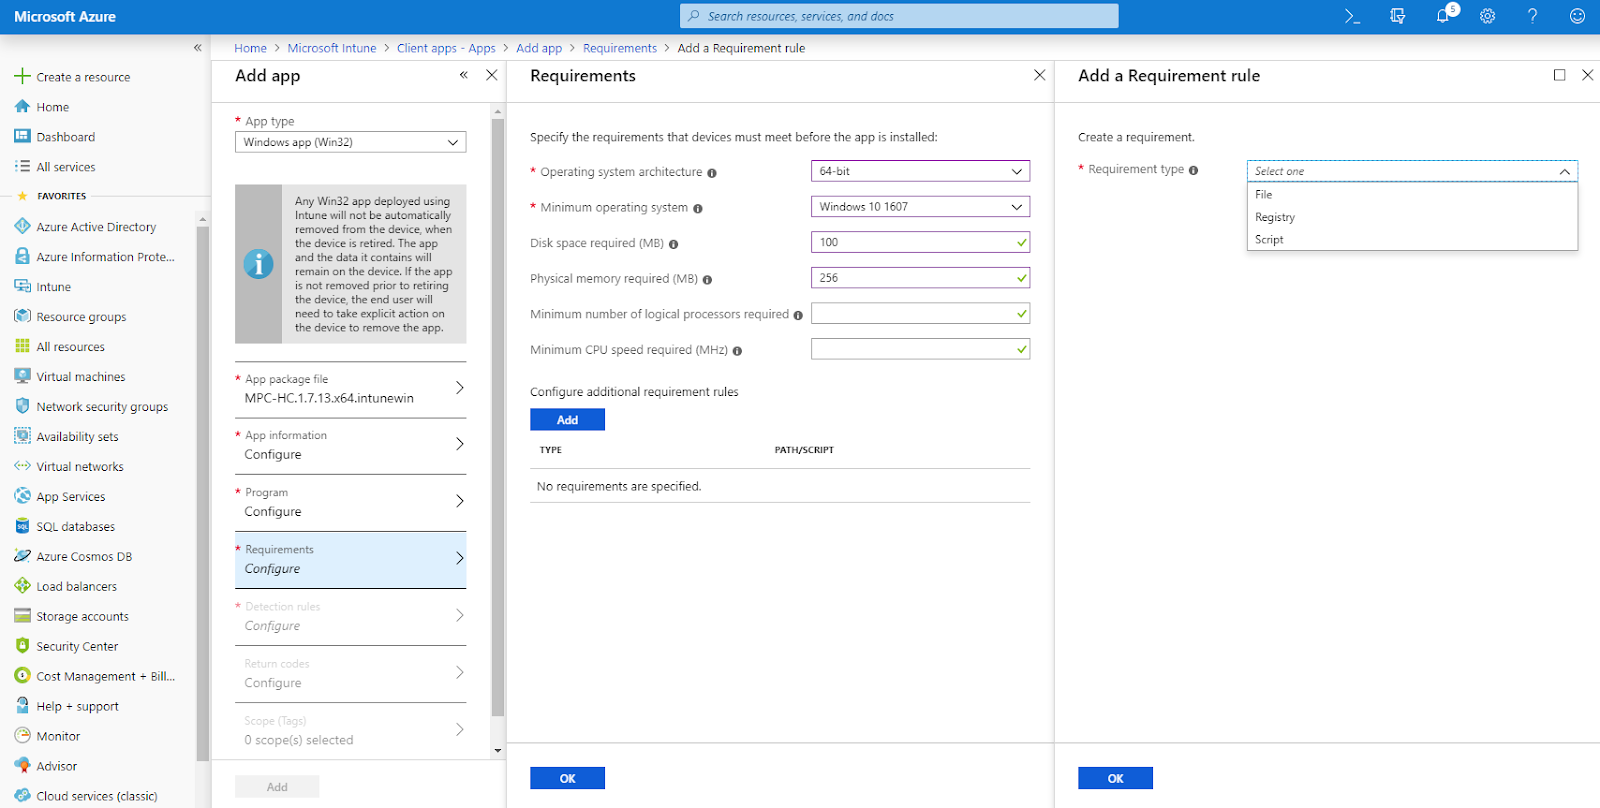
Now open the Requirements blade and configure any applications requirements (please alway match the vendors recommendations). You can also add custom requirements here to ensure dependencies are met.
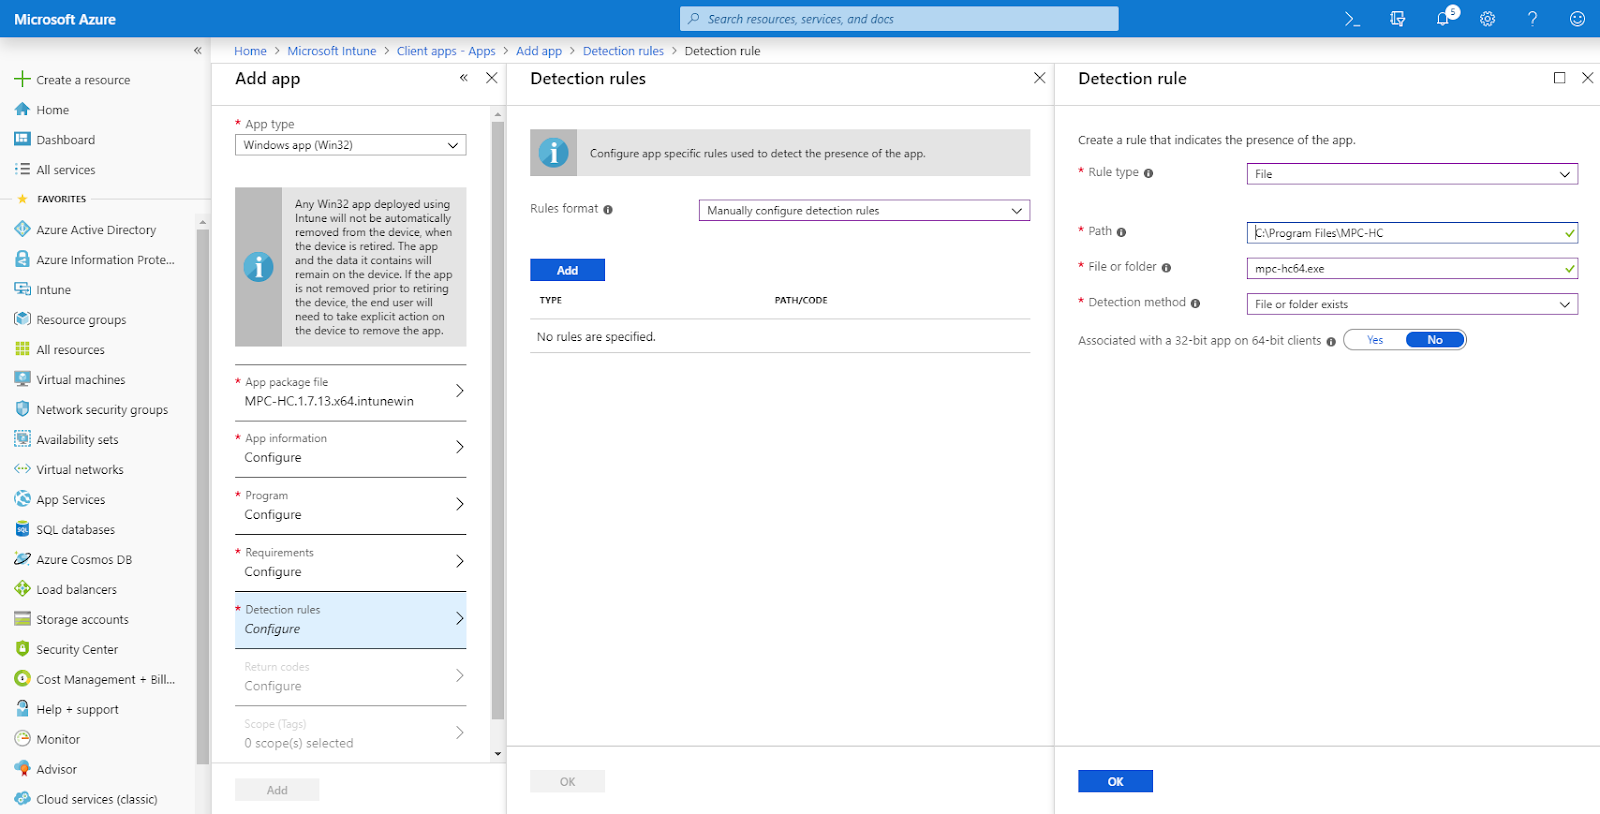
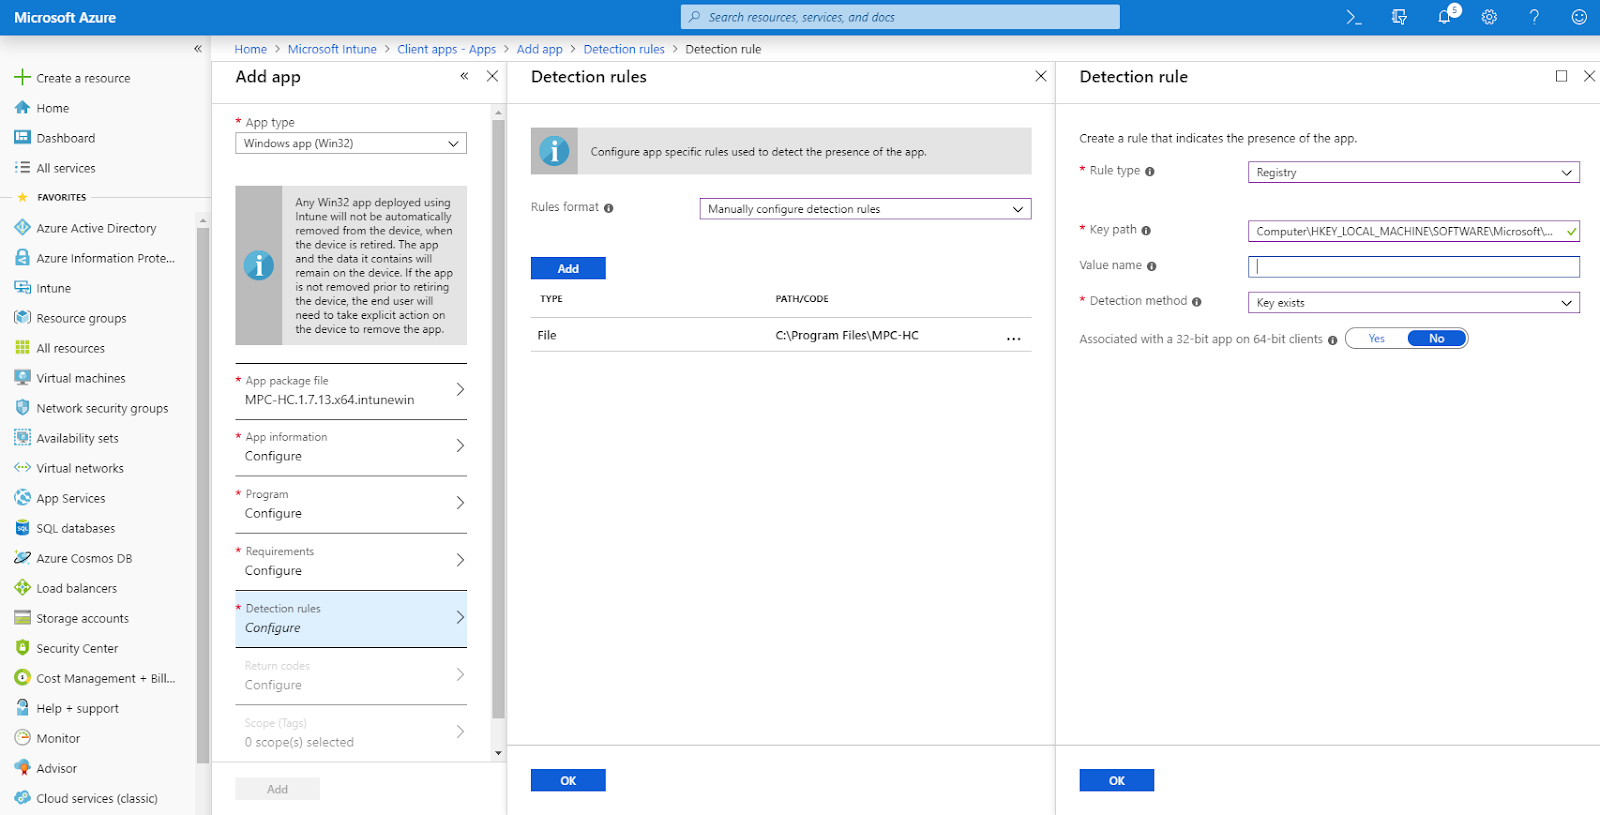
Now to configure our detection methods, in this example we are going to use file and registry
Now we have our detection methods we can also look at customise return codes if required

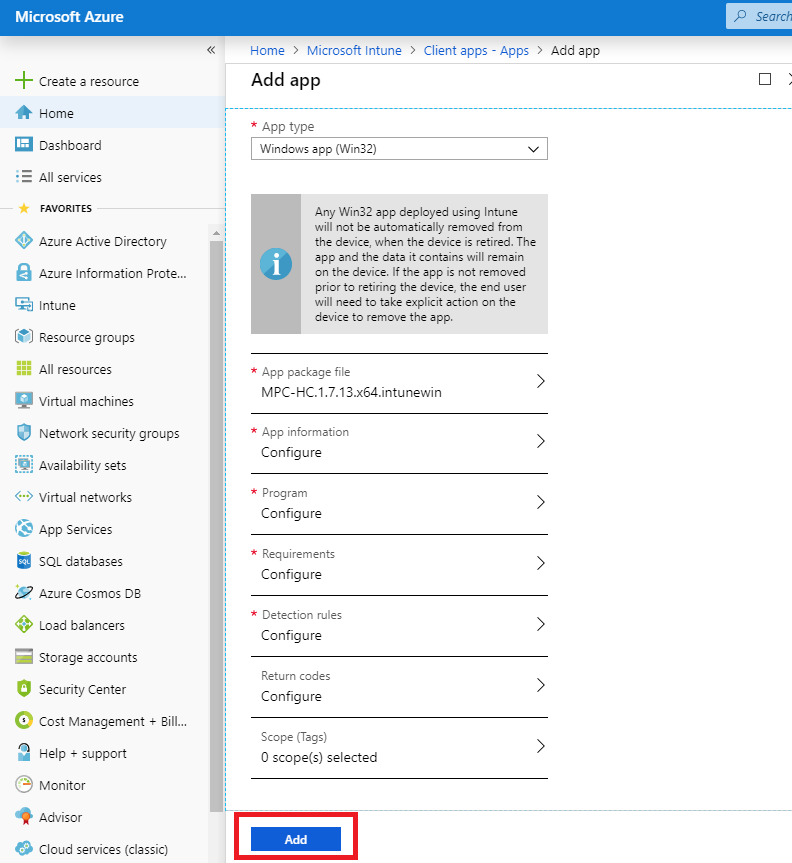
When you have all the required settings configured select Add
Your application will now be uploaded, depending on the size this can take a while.

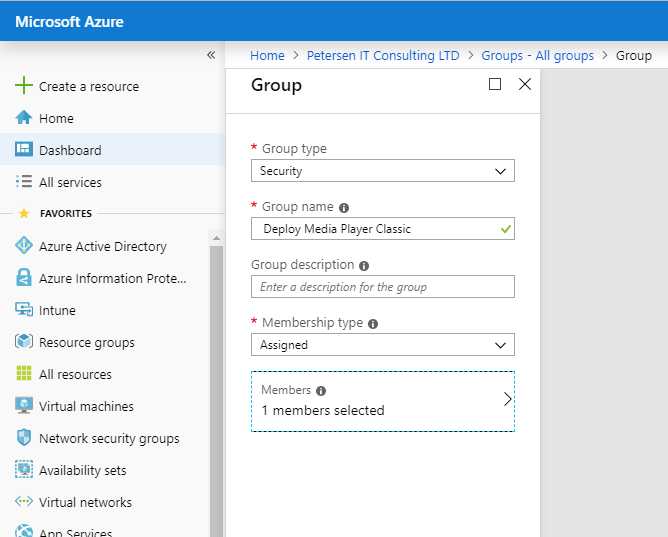
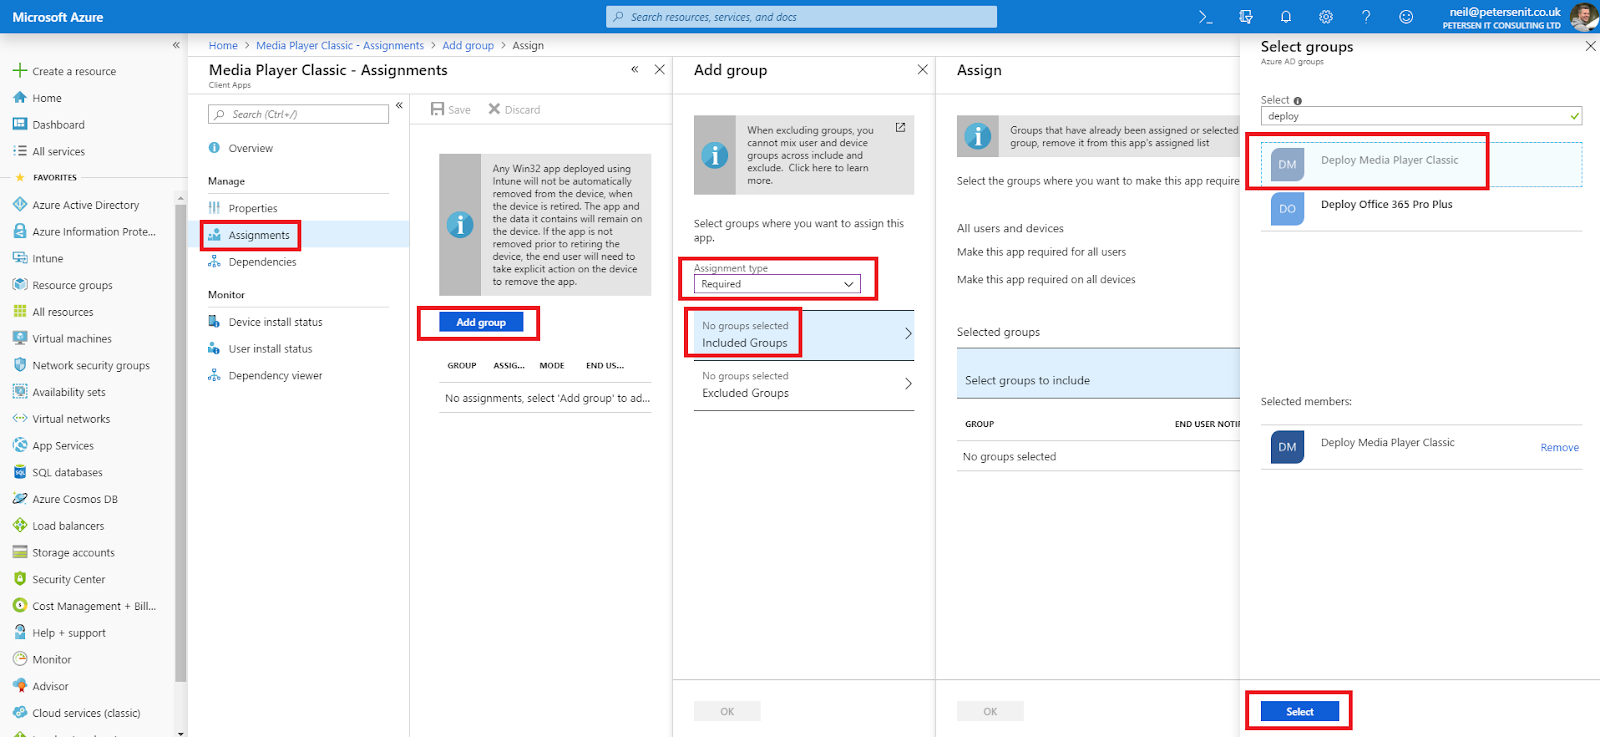
Once uploaded the next step is for us to deploy the applications by assigning this to our device or user groups. I’m going to use a new security group I have just created for this called Deploy Media Player Classic
Select Assignments, Add Group, configure the Assignment Type, Select your required groups.
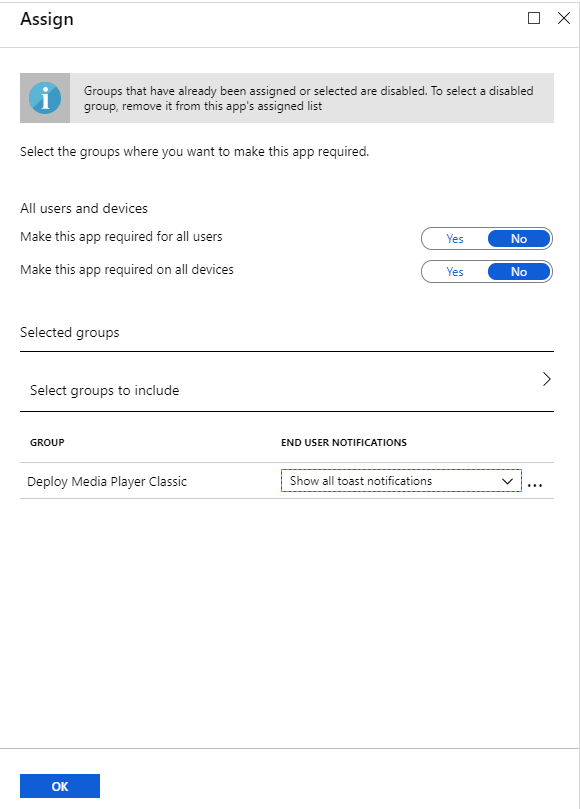
We are going to leave all toast notifications configured and select OK
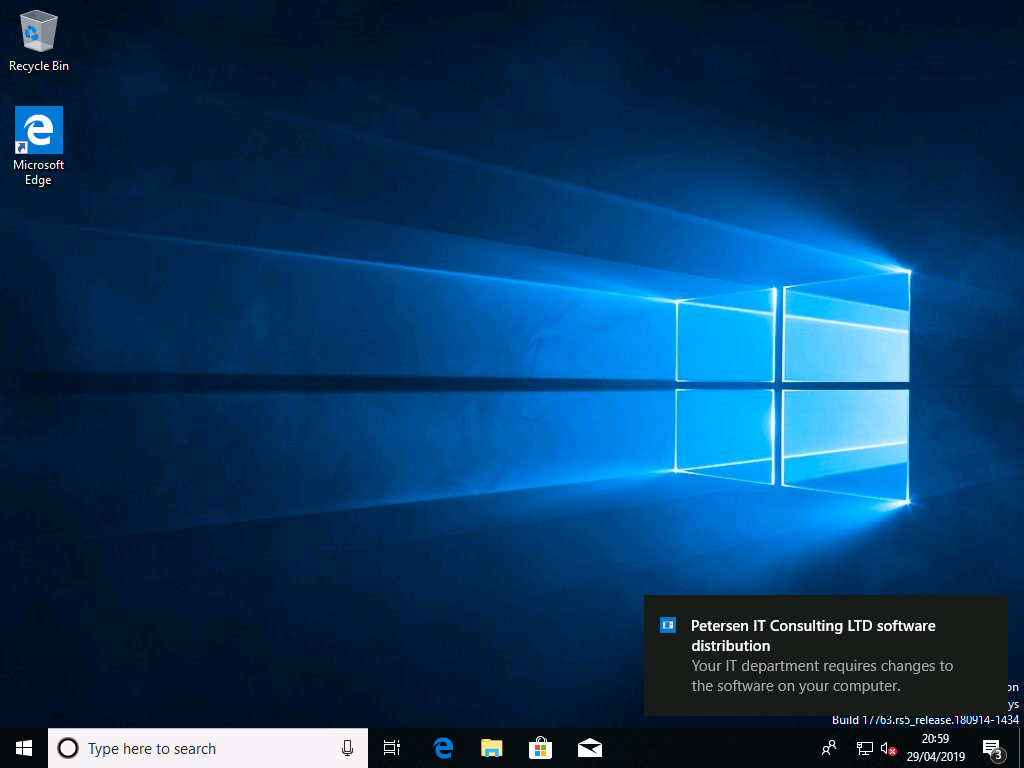
Now on our targeted device we will see the installation occur. First we’ll see some changes are required
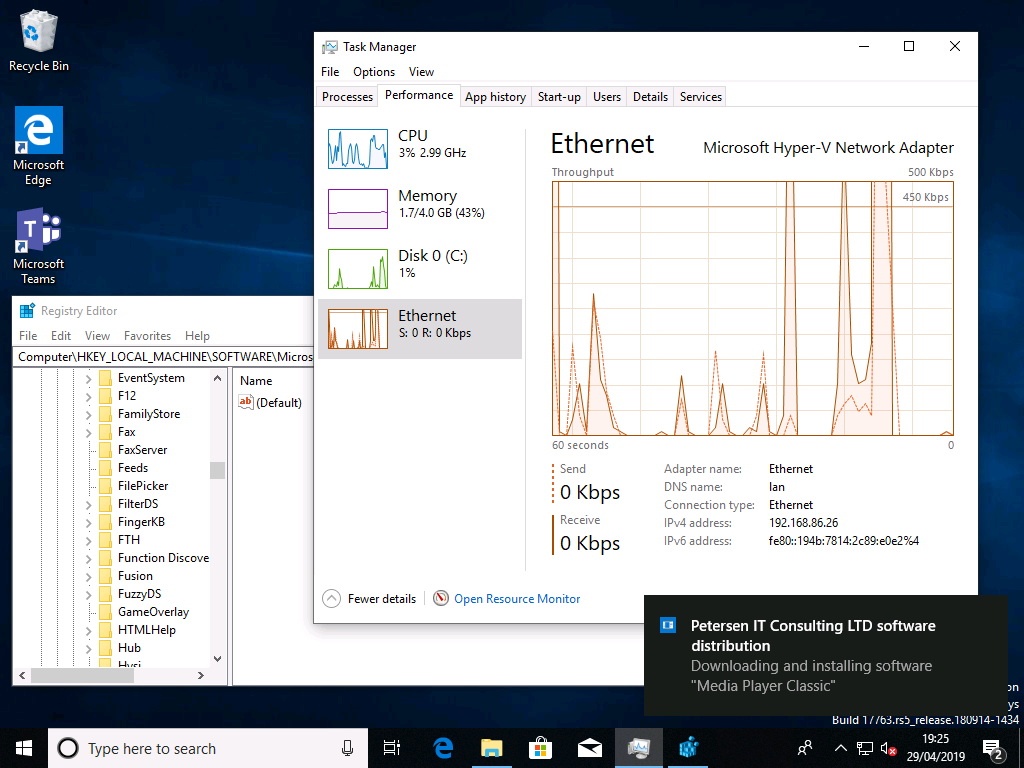
Then you’ll see the application downloading
Followed by the installation success

And we have our Media Player Classic installed.
In the next post I’ll be looking at OneDrive deployment and configuration, or Offline Domain Join… I haven’t decided just yet :)
Any questions of comments, just pop them below and I’ll see if I can help out.
Comments
Post a Comment